December 3, 2018
How to: SpecialistFinishes – Malachite
Cait is decorative painter working throughout UK and teaching from her studio in Perth, Scotland. You can see her work and connect with her on social media; Twitter and Instagram or Facebook.
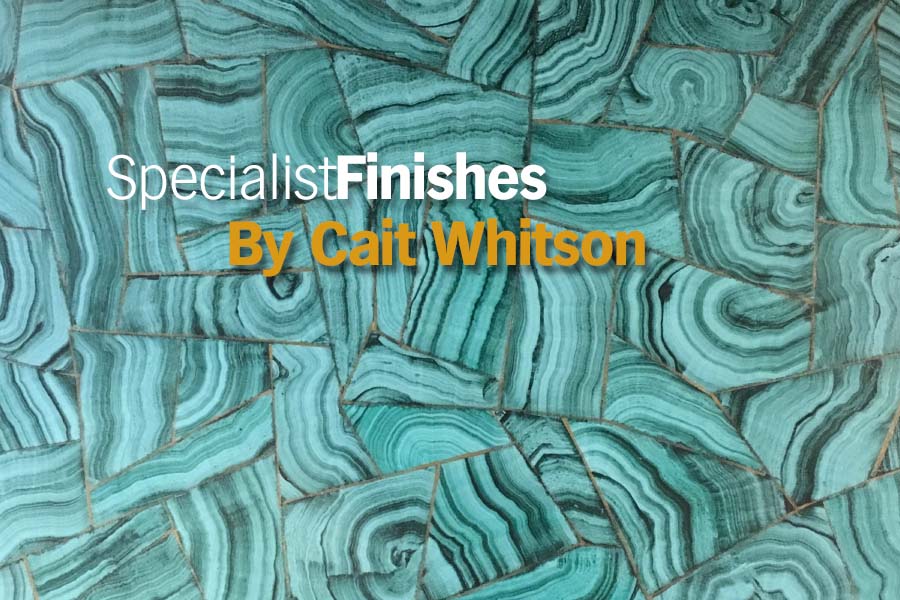
Malachite is Copper Carbonate, typically associated with copper deposits around limestones, the source of the carbonate. It forms most commonly in stalactites and botryoidal formations; botryoidal comes from the Greek and means resembling a bunch of grapes. You can see pictures of Botryoidal Malachite carved vases in the Hermitage Museum, Malachite Room, these huge pieces are rare. More often the mineral is cut and pieced together like a mosaic.
When I first started in this industry Malachite was a standard finish that you learned. Classed among the “Bravura” Finishes it went with Lapis Lazuli and Tortoiseshell. In the 90’s these fell out of fashion, So Malachite went on my business back burner.
 The past 2 years I’ve started to see it creep into interior design. Malachite wallpaper, rugs and upholstery fabrics and this tells me it’s back!! It’s the easiest of all the Bravura finishes and a great finish to use as an inlay or border; it makes a stunning table-top and I did a lovely fireplace, years back, in fragmented malachite for Colefax and Fowler.
 Materials used were:
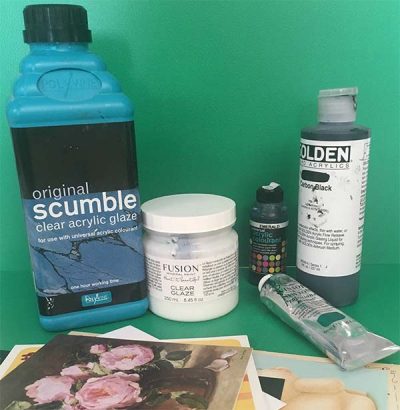
The eggshell basecoat for the first piece was Benjamin Moore’s Floradale Isle 581, similar to BS14 E 53, the second was Benjamin Moore Harbor Side Blue 740. The glaze was the same for both – Fusion Clear Glaze tinted with Phthalo Green and Lamp Black thinned about 10% with water. You could use Polyvine with tints Emerald, Prussian Blue and Black but I wanted to try this glaze out. I found it a nice glaze to use with a very good open time. The main tool is bits of card. I’ve found that old shiny greetings cards are best, although I’m sure you could use anything to hand and get interesting results. You will need a laying on brush and some rag.
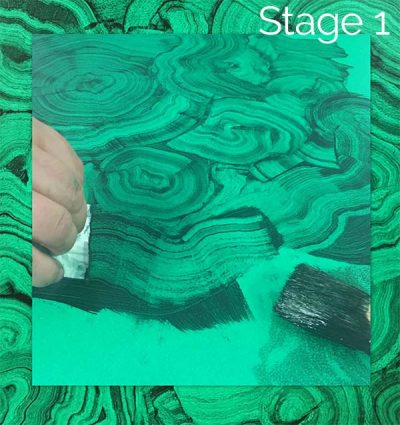
 Stage 1:
For the freeform Botryoidal Malachite done first I laid the glaze on and created some rough ideas of shapes with the brush to give me a compositional guideline and to thin and even out the glaze a bit. Because you are scraping through the glaze it leaves ridges – too thick a ridge will take a long time to dry. Fold the card and tear straight edged pieces that are varied in size. Draw the torn edge of the card through the glaze creating interesting malachite style shapes. Wipe off the card after each pass. One bit of card will work brilliantly while the next won’t and equally your brilliant bit will become soggy and stop working so you need to have lots of bits to work with. Some people cut teeth into the card, however I find this ends up looking a bit repetitive and it’s time consuming.
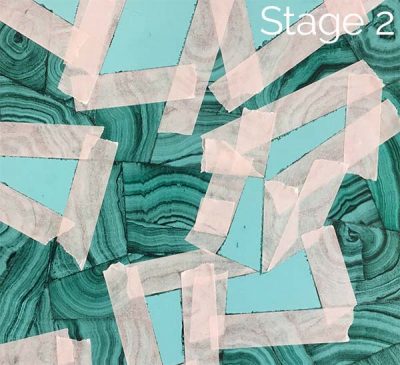
 Stage 2:
The fragmented design in a more teal colour with lightly broken bronze grout is a modern twist. Draw up your design of fragments in water colour pencil, this will dissolve as you paint. Mask up alternate shapes and carry out the same process. For this you might want to dilute the glaze further to encourage drying as it has to be carried out over 3-4 phases. I used a hairdryer to speed the drying and the Tesa Pink masking tape as this won’t damage freshly painted sections.
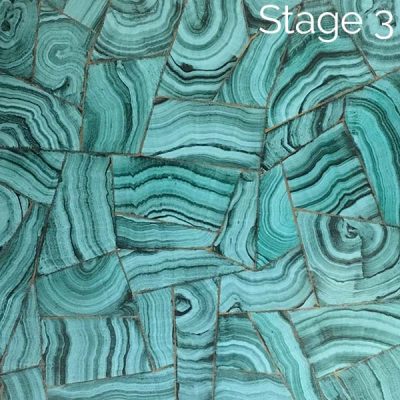
Stage 3:
Once your piece is complete varnish to protect with a semi-gloss or high gloss varnish.
I first learned this technique 32 years ago at The Pardon School of Specialist Decoration. Leonard Pardon sadly died earlier this year and I wrote this with his memory in mind.
This video shows a demonstration that was carried out at the 2018 National Painting and Decorating Show
Reproduced from The Professional Painter and Decorator Autumn 2018 issue